We all love a good candle. So what if I told you that you can easily make your own candles at home, with less toxic ingredients annnndd inside of beautiful vintage vessels that don’t have ugly labels or stickers and instead fit your personal style and home perfectly? ( Sounds like a dream right?!)
Well if you’ve followed the channel for a while, you know that I’ve actually curated a couple of vintage vessel candle collections from all the gorgeous vessels I’ve found on my many thrifty adventures.
So I can confidently say from experience that this is such an easy DIY that you can do with nearly any vessel. From old glassware, teacups, sugar dishes, crocks and more, you can re-purpose them all to make beautiful, functional pieces of custom home décor. ( oh, and never need to buy another candle again! )
I’ve put together a list of the supplies you’ll need AND the step by step instructions ( plus bonus tips along the way!) to show you how you can easily make your own beautiful DIY Candles. So grab your supplies below and let’s get candle making!
What You’ll Need :
- Your Vessel of Choice ( My favorites are thrifted but maybe you have a family china dish you want to re-purpose!)
- Wax ( I prefer 100% soy wax)
- Wicks ( I prefer 100% cotton wicks)
- Candle Making Pitcher
- Essential Oils of Choice ( I recommend using high quality ones, save $10 on my favorite ones here! )
- *Coconut Oil ( this is optional, but adding this helps stabilize your candle when using soy wax! )
Step #1
Fill your candle making pitcher with your wax and place it over a pot of boiling water to melt. Note : this can take a few minutes to melt completely.
Step #2
While your wax is in the process of melting, prep your vessel for the wax. Do this by ;
- Cleaning and drying your vessel well.
- Place your wick(s) to the bottom of the inside of your vessel. ( The wicks I use have a double sided adhesive sticker that make this process very easy!)
- Stabilize your wicks into place with the wooden wick supports they come with. ( This will help hold your wick in place once you have poured the wax. )
Step #3:
Once your wax has melted completely down and been sitting in the boiling water for a while ( make sure the wax is also getting hot and not just melting) , add a teeennnyyy amount of coconut oil to the melted wax and mix in well. ( Approx. 1/2 tablespoon for a full pitcher of wax. )
Step #4:
Take the pitcher out of the boiling water and set to the side to cool for a few minutes. ( you want the temperature to come down a little but remain completely melted! )
Step #5
Once you have let your wax cool down just a little bit, it’s time to add your essential oils! Mix and match to create custom combinations. ( Some of my favorites are vanilla and cinnamon, lemon and orange, and vanilla and coffee! ) Stir them in thoroughly.
Pro Tip: Add way more essential oil than you think you need, the smell will fade slightly once the wax has solidified again.
Step #6
After adding your essential oils it’s time for the “hardest” part of this process in my opinion… pouring. Take your melted wax mixture and gently pour it into your prepped vessel. Pour slowly and neatly while trying to keep your wick as stabilized and straight as possible.
Step #7
Make the final adjustments to your wick, making sure it’s sitting exactly how you want it and then carefully sit your candle off to the side to firm up for about 12-24 hours.
Step #8
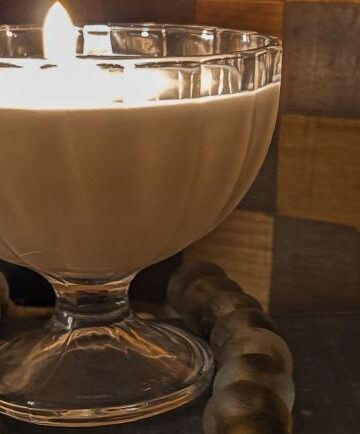
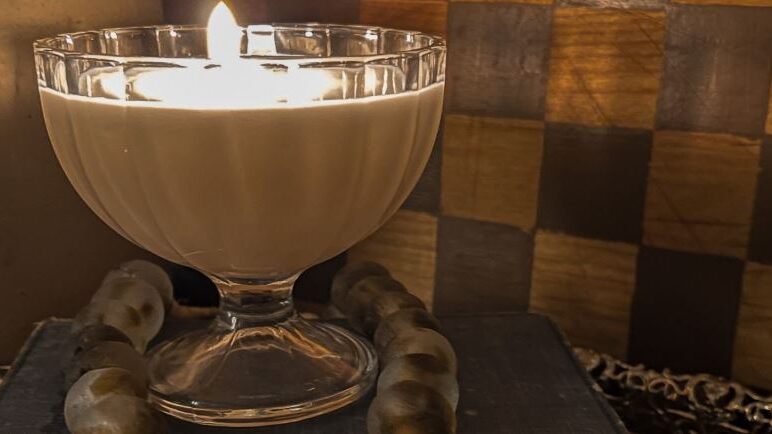
After 12-24 hours, your candle should be completely solid and ready to use! Simply trim your wick down to about 1-1.5 inches and enjoy your DIY custom candle!
And it’s really THAT easy to make your own DIY Candles. If you want an even deeper tutorial, or more visuals, I made a video showing this entire process step by step over on the YouTube Channel and I would love to see you over there!
I hope you love your new candles!
And don’t forget, you can keep browsing more DIY projects here on the blog!

Welcome To
")
Inspiration to design a home and a life that is full of joy.
LEAVE A COMMENT
Comments