Have an old lamp that is still perfectly good but just…. ugly? Or maybe you thrifted a lamp that has a really cool shape but is the most obnoxious shade of blue? What if you didn’t have to throw it out or spend a pretty price tag on a new one? What if I told you that you could turn those ugly pieces into beautiful DIY painted lamps?
You can completely upcycle any lamp with this super easy, faux ceramic technique that will make any lamp look like a gorgeous, textured antique artifact! Don’t believe me? Watch me turn a couple of thrifted, dated, broken lamps into some STUNNING ( and functional!) pieces.
UPDATE: It’s now been a few years since I completed this project and while the finish has held up… I do need to let you know that I DO NOT recommend doing this on brass or other metal pieces because the baking soda and the paint create a reaction that will patina and cause the metal to rust or the brass to turn green and also creates a goo. But it works BEAUTIFULLY on ceramic pieces!
Here’s What You’ll Need:
- Thrifted or any old lamp you want to upcycle.
- Lamp repair kit ( Only needed if your lamp doesn’t work anymore!)
- 3-5 Cheap Chip Brushes ( I do NOT recommend using any kind of nice brush, it will get ruined in this process, the cheaper the better)
- 3-5 Paint Colors ( I’ll share the colors I used below)
- Baking Soda
- Painters Tape
Bonus Tip: To get some really great natural, earthy paint for a great price, head to your hardware store and get paint samples. The little jar is PLEANTY of paint and it usually only runs about $5 per sample. I find this to be a much better deal and also a better color selection than buying any fancy paint from a craft store.
First…Quick Story Time
Okay… so I just HAVE to share how I found these lamps to start with because it’s just such a rare thing to stumble on.
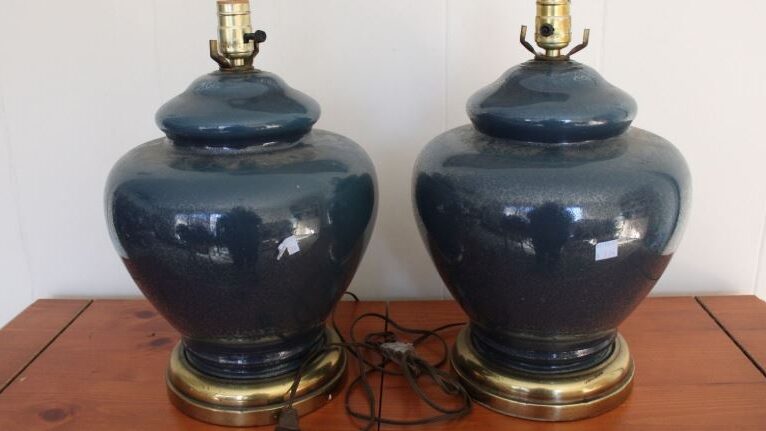
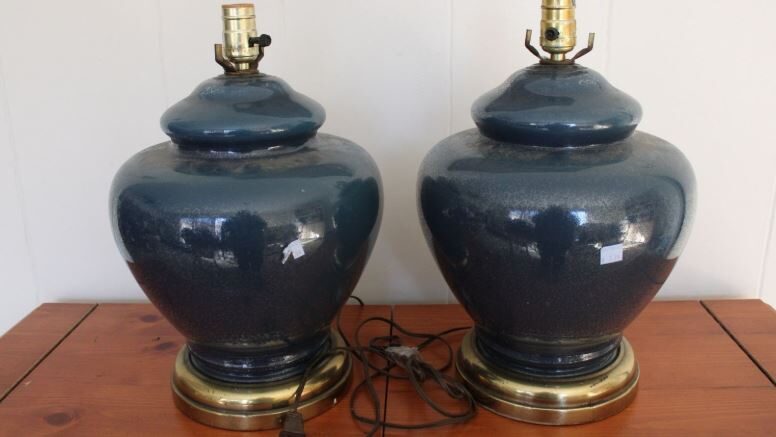
I was thrifting and I found a lamp in the bottom of an outlet bin, and I was like “wow, what a great lamp”. It was a good size, a fun shape, not cracked or disfigured and it was marked only $7.
To put things into perspective, I’ve seen large lamps this size usually cost upwards of $70 or $80 dollars a piece. I knew I could make this guy awesome and we needed a lamp, sooooo I grabbed it.
BUT THEN….I FOUND IT’S MATCHING TWIN IN A DIFFERENT BIN!
So obviously I HAD to grab it too. And now I had a large set of matching lamps for $14. What are the chances? Incredible.
BUT WAIT, THERE’S MORE …
I got to the register and the lamps rung up for $2 DOLLARS EACH. So for under $5, I now had a matching set of large lamps. If I purchased a set of lamps this size from the store new, it could cost me more than $160 dollars!
So yes, these guys were UGLY, but my goodness were they full of potential. And I was SO EXCITED to get started.
Check Wiring and Re-Wire Broken Lamps
So the first thing I did was make sure that the lamps actually worked before putting energy into painting them.
I ordered this lamp repair kit. It came with everything you need to re-wire a lamp that no longer works.
As for actually re-wiring the lamps, I got lucky that only one of them actually needed to be re-wired at all. And then I found this YouTube video that was short and sweet and had all the steps clearly laid out for actually re-wiring the thing. ( It’s MUCH simpler than you think. )
Disclaimer: I DID have Josh help me with this lamp, BUT not because it was difficult or complicated. The lamp was actually rusted together where I needed to take it apart and I was struggling to take it apart myself. I asked him to help me take it apart and then he was in it for the long haul and helped me with the rest. Since then, I have actually rewired a couple of other lamps all by myself with this kit, it is very simple and I promise you can do it!
Prep For Painting
Okay, so now that we have lamps that work, it’s time to make them look good too.
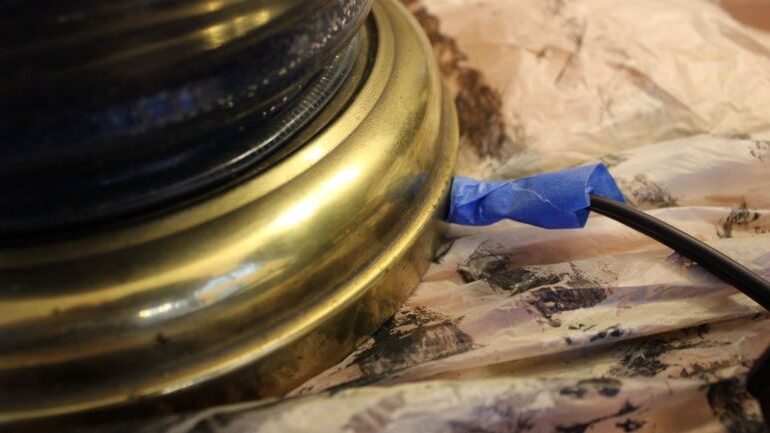
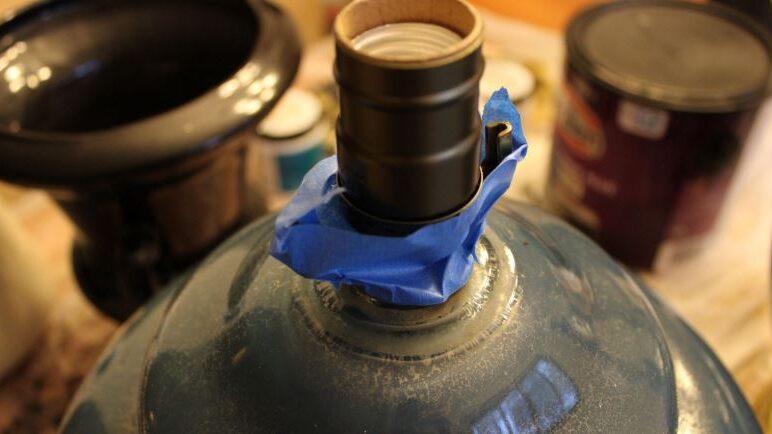
To prep your lamps for the best possible result, you’ll want to tape up the cord where it meets the base. ( Like shown above)
And also at the top just to avoid getting any stray paint on the socket part. This will make painting easier and just give your project a cleaner look when you are finished.
Time To Paint
So we have to start by giving the lamp a good base coat. This will cover whatever old exterior we don’t want. It will also start to layer texture and also give the future layers something to stick to. Especially if your lamp is glass ( like this one was) , metal or any shiny glazed finish.
Getting a good base coat to cover will be really important in helping you get a good outcome where your future paint layers don’t just rub off as you paint.
Take your lightest color ( I used Sculpters Clay) and a little baking soda and mix it together until you have a thick paint. Note: if it gets too thick like a paste you won’t be able to paint it onto your piece. A little goes a long way.
Once you have a good base coat down of your baking soda paint mixture it’ll probably look something like this…
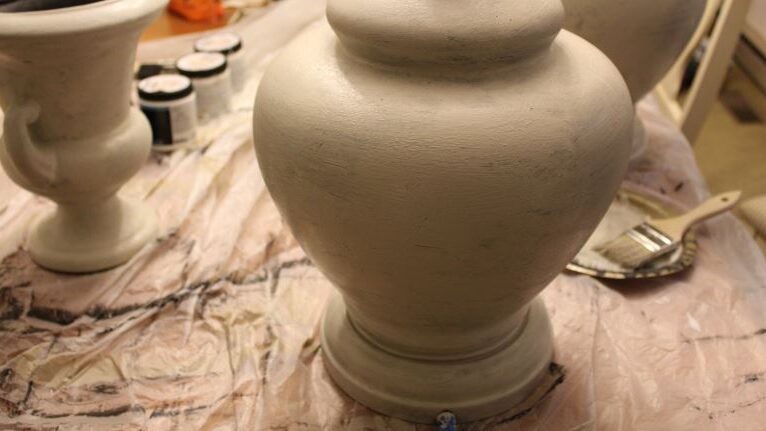
Not cute, but it’s covered and once it’s dry, we will have a great base to paint on that will act more like a raw ceramic finish we are going for.
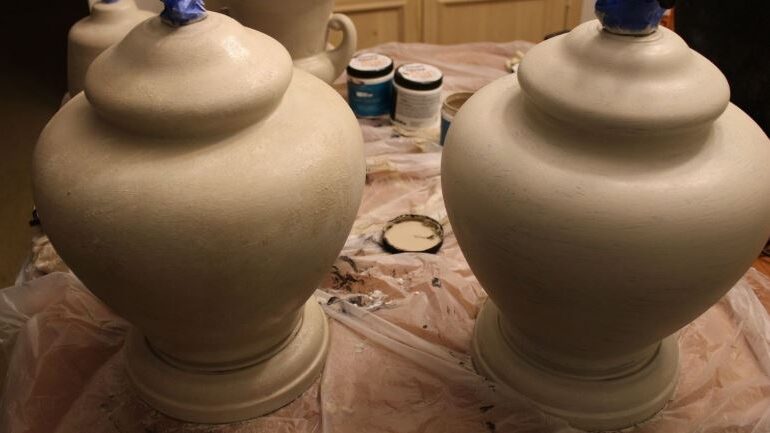
Once that base layer dries completely, it is time to really start adding some magic. So we are going to take our next lightest color ( I used Eiffel For You ) and mix in a good amount of baking soda ( still paintable though!) to start adding in some shadows and age spots along with more texture.
The key is to let the lighter base still peek through, NOT to cover the entire thing in one solid color. This is what will really add that aged look we are going for.
Bonus Tip: Use a dabbing/stippling motion with your paint brush and really load a lot of paint onto your brush. Then slowly work your way outward as your brush becomes empty. This will help you get a super natural and smooth layered look.
It’s very subtle, but you can see the added dimension that this second color gave the lamp on the left compared to the one on the right that is only the base coat.
Time To Get Creative
The next steps after this are where you really get to be creative, and customize this to YOUR taste.
Want it lighter? Use lighter colors and add less aging.
Want it to have more texture? Layer on the baking soda and glob on the paint thick!
Want to tape off the bottom to add a raw ceramic finish to the bottom? Go for it!
YOU get to play and have fun with this.
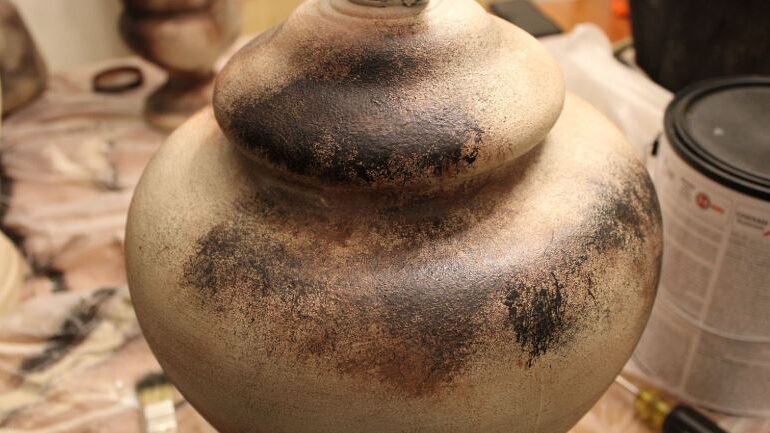
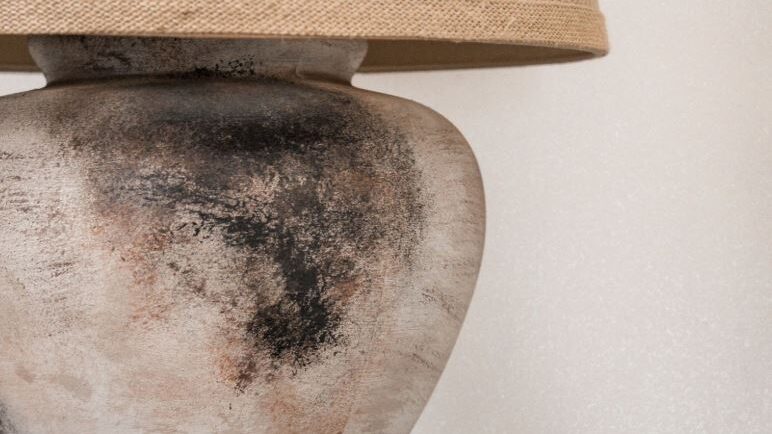
Now that we have a multi dimensional base that really resembles raw ceramic, we are going to take our darker colors and really add on the aging spots. The colors I used for this were Perfect Penny, Natural Bark, and honestly just a random nameless black trim paint I found a gallon of in our supply stash.
You can see how I layered a rust color, with the brown on top and then finally added some touches of black at the end in the photo below.
Bonus Tip: A little goes a LONNNGGG way. When adding your darkest colors, start with very small amounts and stipple them and blend them outward. Also be careful of “over blending”. To get that aged look we want lots of layers of different colors, not a bunch of different colors blended into one.
Extra Bonus Tip: Look up some inspiration! I found it super helpful to reference a photo of an aged pot while I was doing this, it helped me see patterns I could use and also how to layer in a way that looked super natural.
Once you have layered and dabbed until your heart is content, and you are happy with how it looks, let it dry completely, take off the painters tape, add your lamp shade and start enjoying your brand new, upcycled lamp!
Before And After…
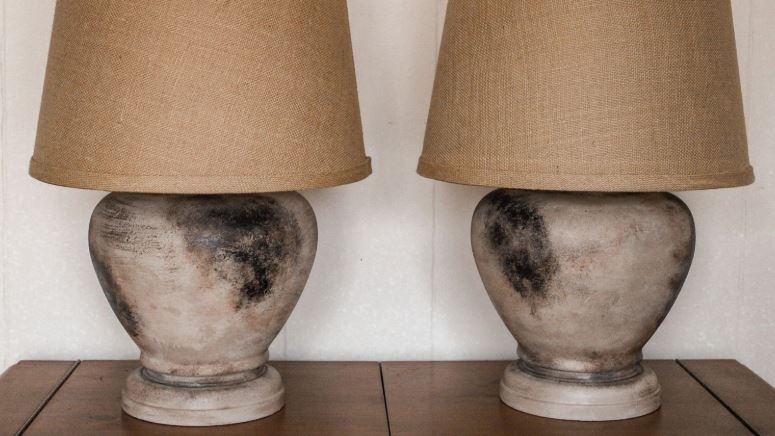
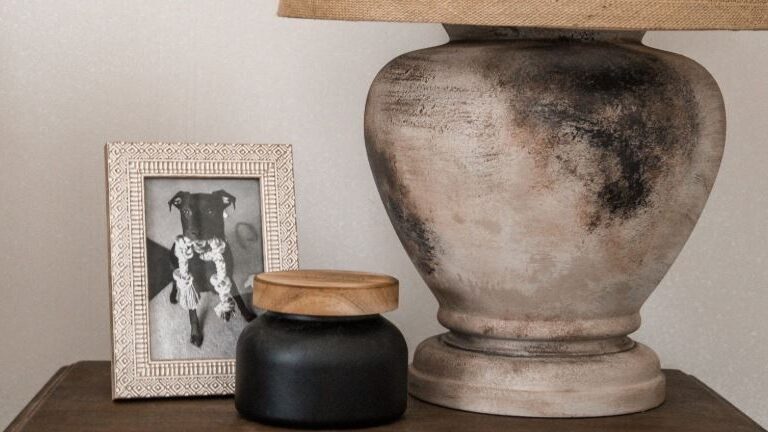
This technique can be used on almost any material. From plastic, to glass, to glazed and unglazed ceramic. So get creative and see what amazing pieces you can make. Try it out on an old lamp, pot, vase or bowl!
And if you do I would love to see how it turned out so please share it with me @brookedonnellyliving on Instagram!
And for more DIY home décor projects, keep on reading the blog!

Welcome To
")
Inspiration to design a home and a life that is full of joy.
LEAVE A COMMENT
Comments